Learn · Welding
Reading Welding Symbols
Part of Your First Welding Cert · step 16 of 24 · next: WPS and PQR: How Procedures Work
In learning paths: Your First Welding Cert
A welding symbol is a sentence written on a horizontal line. Learn the grammar once and every print in the country reads the same way, because US drawings use one standard system maintained by the American Welding Society. The whole language hangs on a single rule about where things sit relative to that line.
Why it matters on the job
The symbol is the contract between the engineer and your hands. It says what weld, which side, how big, how long, and sometimes which procedure. Misread the side rule and you weld the wrong face of a joint that may be closed up and inaccessible by the time anyone notices. Symbol reading is also universally tested: written welder exams, NCCER performance tasks, and inspector exams all lean on it.
The anatomy
Every welding symbol is assembled from the same parts:
- The reference line is the horizontal spine everything else attaches to.
- The arrow runs from one end of the reference line and points at the joint.
- The weld symbol is the small shape that says what kind of weld: a triangle for a fillet, a V or bevel shape for groove welds. Note the wording: the weld symbol is the shape; the welding symbol is the whole assembly.
- Dimensions flank the weld symbol: size to the left of it, length (and pitch for intermittent welds) to the right.
- The tail, a fork at the far end, holds notes: a spec, a process, or a WPS number. No notes, no tail.
- Supplementary symbols: a circle where arrow meets line means weld all around; a flag there means a field weld, made at the site rather than the shop.
The rule the whole system hangs on
Below the line means arrow side: the weld goes on the side of the joint the arrow touches. Above the line means other side: the weld goes on the opposite side. Symbols on both sides of the line call for welds on both sides of the joint.
That is the entire rule. It has nothing to do with left or right, up or down on the part, or where the arrow approaches from. Only which side of the printed reference line the weld symbol sits on, and which side of the joint the arrow physically touches.
Worked example: decoding one symbol
A print shows: an arrow to a T-joint, and on the reference line a fillet triangle below the line with 1/4 to its left and 6 to its right, plus a triangle above the line with 3/16 to its left, and a flag at the bend.
Read it in order:
- Triangle below the line: fillet weld on the arrow side, the side the arrow touches.
- 1/4 left of that triangle: leg size 1/4 in.
- 6 right of that triangle: the weld is 6 in long, not continuous.
- Triangle above the line with 3/16: a second fillet on the other side, leg size 3/16 in.
- The flag: both welds are field welds, made on site.
One line of grammar just specified two different welds on two sides of one joint.
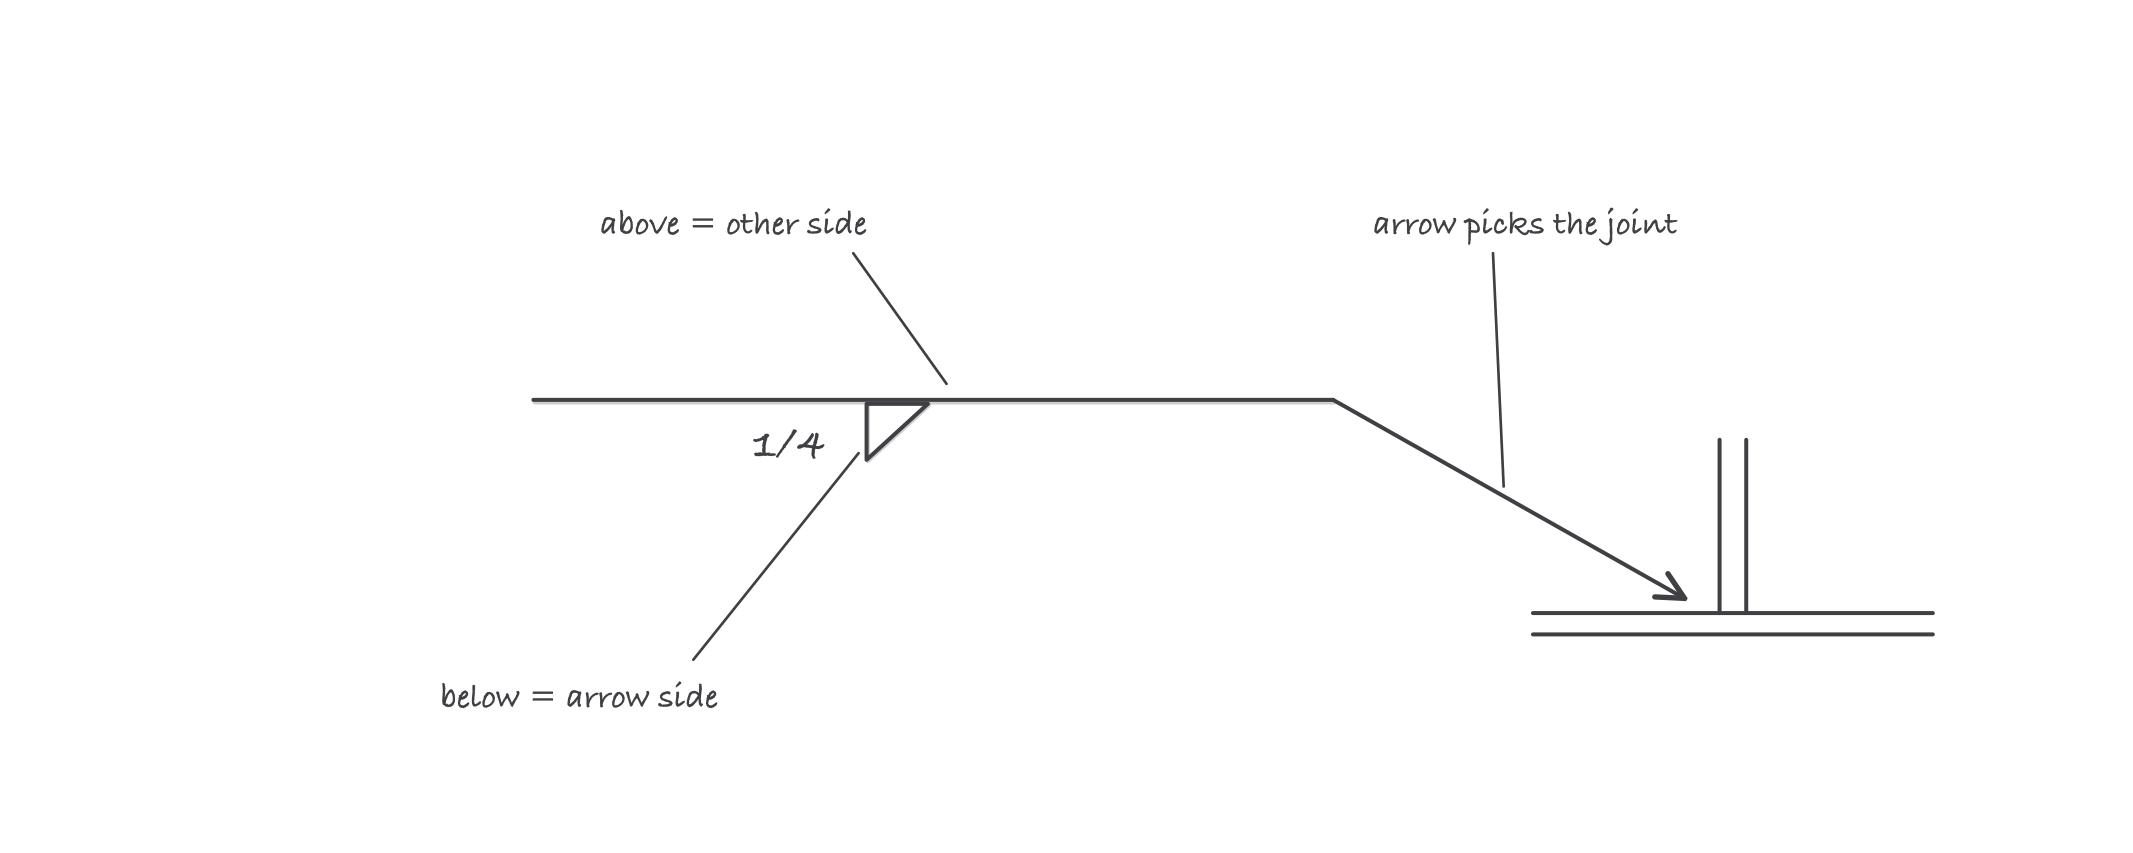
Below the line, weld the side the arrow touches; above it, weld the far side
Where it bites
- Arrow side is about the arrow, not geometry. The same weld can be drawn with the arrow approaching from either side of the part, and the meaning flips with it. Trace the arrow to the joint every time.
- A missing size is not a free choice. When no size appears, it is governed somewhere else: a general note or the spec in the tail. Find it; never assume.
- Intermittent welds have a pitch trap. The pitch number is center-to-center spacing of the segments, not the gap between them.
- Not every drawing is domestic. Prints from overseas may use the ISO system, where the side convention differs. If a print looks foreign, confirm which standard governs before welding to it.
Exam relevance
The arrow-side rule is the most-tested single fact in symbol reading, on welder written exams and inspector exams alike. Expect questions that also probe the weld symbol versus welding symbol distinction, dimension placement (size left, length right), intermittent weld pitch, and the weld-all-around and field weld marks. Practice by decoding symbols aloud in the same order every time: side, type, size, length, extras.
Verified requirements
| Where | Expires | Renewal | Continuing education |
|---|---|---|---|
| United States (federal) | Yes | 9 years, with renewal applications required at years three and six after the initial activation date | 80 Professional Development Hours is one of four nine-year recertification routes; the others are retaking Part B Practical, passing an endorsement exam, or achieving Certified Radiographic Interpreter status |
| United States (federal) | No | Confirm with issuer | Confirm with issuer |
Information comes from issuing-authority sources. Confirm current rules, fees and eligibility with the authority before acting.