Learn · Carpentry
Trim and Casework
Part of Carpenter, Frame to Finish · step 15 of 30 · next: Cabinet Installation
In learning paths: Carpenter, Frame to Finish
Assumes you know: Door and Window Installation
Finish carpentry is the work of concealing the fact that nothing in the building is straight, square or plumb. Framing tolerates an eighth of an inch. Trim shows a thirty-second, and it shows it in a hallway with a window at the end of it.
Why it matters on the job
Trim is the last thing installed and the first thing anyone looks at, so it carries the reputation of every crew that came before you. It is also the work where a good carpenter is visibly worth more than an average one, because the skill is in the joints, and joints cannot be hurried.
Cope inside corners, miter outside corners
An inside corner in a real house is not 90 degrees, and even if it were, the two pieces would shrink away from each other across the season.
A mitered inside corner puts two 45 degree faces against each other. When the corner is off, or when the wood shrinks, that joint opens along its whole length and you can see daylight in it.
A coped joint solves both problems. The first piece runs into the corner and butts the wall, square. The second piece is cut to the exact profile of the first, so its face sits against the face of the first piece. If the corner is off by a degree the joint still closes, and when the wood moves, it slides rather than gapping.
To cope: miter the end of the second piece as if for an inside corner, which exposes the profile as a line on the cut face. Then cut along that line with a coping saw, angling the blade back so only the front edge of the cut touches the other piece. Test on scrap, refine with a file.
Outside corners get mitered, because there is no profile to cope to, and because an outside corner is visible from both sides.
Outside corners are never 90 degrees
Measure the actual angle with a bevel gauge or an angle finder. Then split it.
The saw’s scale reads zero at a square crosscut, so the setting you want is:
saw angle = (180 − corner angle) ÷ 2
Check it against the case you know: a true 90 degree corner gives (180 − 90) ÷ 2 = 45 degrees, which is right.
Worked example: a 91 degree corner
The angle finder reads 91 degrees at an outside corner.
- Saw angle: (180 − 91) ÷ 2 = 89 ÷ 2 = 44.5 degrees on each piece.
- Cut both pieces at 44.5 degrees, not one at 45 and one at 44.
- Dry-fit before nailing. If the joint is open at the front, the angle is slightly too large; if it is open at the back, slightly too small. Adjust by a quarter degree and recut on scrap first.
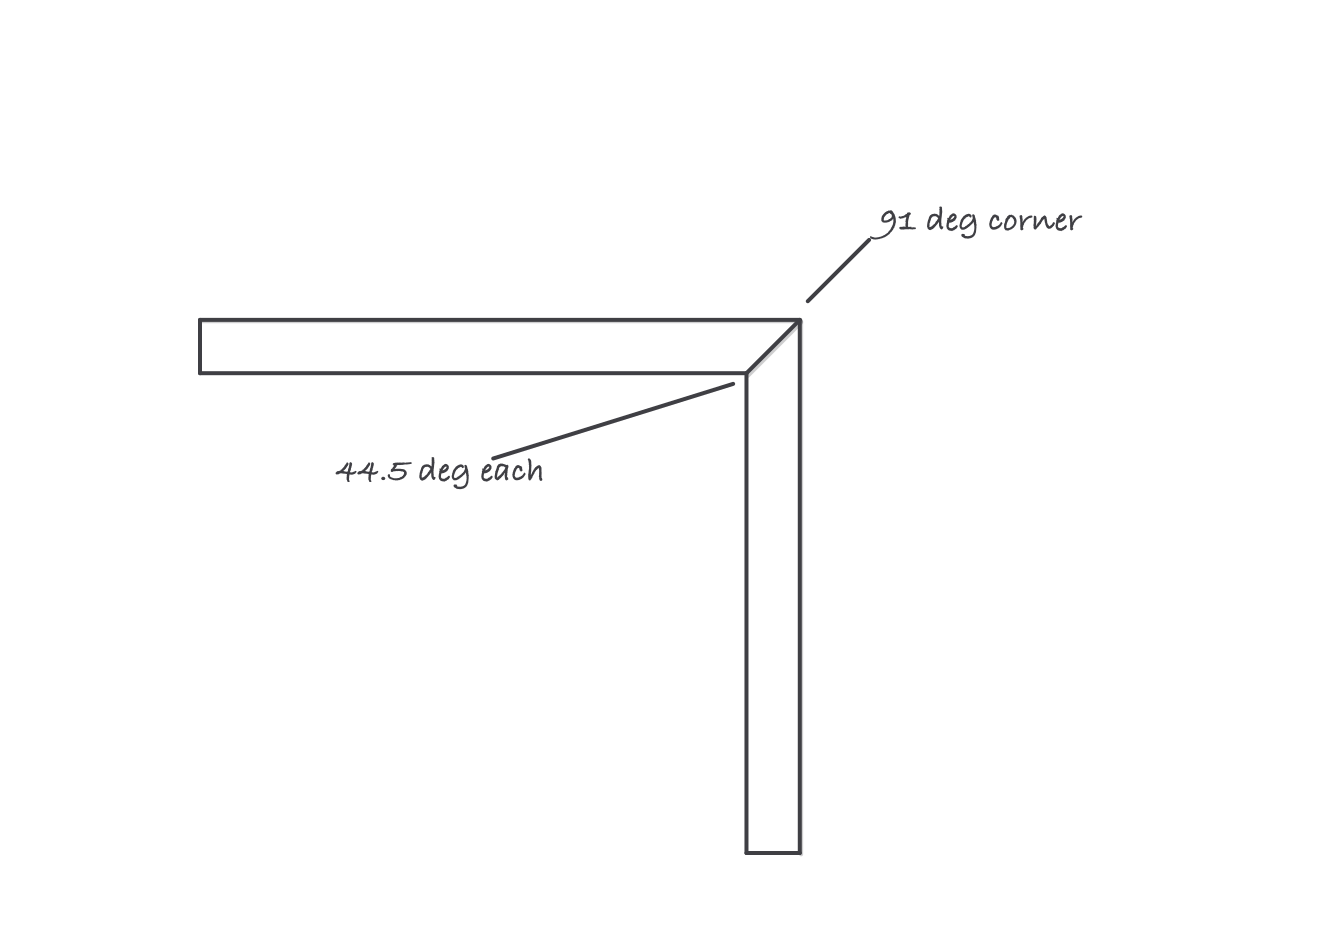
Split the angle you measured, never the angle you assumed
Half a degree sounds like nothing. On a 3 1/2 in wide piece of casing, a half degree of error opens the back of the joint by roughly 3.5 × tan(0.5°) = 3.5 × 0.0087 = 0.03 in, which is a hairline you will see from across the room once it takes a coat of paint.
The rest of the joinery
Returns close the end of a run that dies into open air. A return is a small mitered piece that wraps the profile back to the wall, and it is the detail that separates finished work from cut-off work.
Scarf joints join two pieces in a long run. Cut both ends at a matching angle so one laps the other, land the joint over a stud, and orient it so the lap faces away from the room’s entrance and disappears.
Reveals are the consistent setback of casing from the edge of a jamb, commonly 1/4 in or 3/16 in. Set a combination square to the reveal and use it as a gauge on every casing in the house. The eye reads consistency, not the dimension itself.
Tool safety on finish work
Trim work means a nailer in your hand all day at close quarters. OSHA reports about 37,000 emergency department visits a year from nail gun injuries, with about 68 percent of those involving workers, and it reports that two of five residential carpenter apprentices were injured by a nail gun over a four-year period.
The trigger mechanism is where that risk is decided. A contact trigger fires whenever the nose is depressed while the trigger is held, which is what makes bump-firing fast. A full sequential trigger requires the nose to be pressed before the trigger, every single nail. OSHA states the risk of injury is twice as high with multi-shot contact triggers as with sequential ones. On trim, where you are working near your own hand and near finished surfaces, sequential is the mode to use.
Saw guarding is regulated too. Under 29 CFR 1926.304, portable circular saws must have guards above and below the base plate, and the lower guard must return automatically to the covering position when the saw is withdrawn from the work. Fixed woodworking tools need a disconnect switch that can be locked or the control key removed. A lower guard that has been wedged or tied back is a saw that should not be on the job.
Where it bites
- The corner is never the angle you assume. Measure every corner, including the ones that look fine.
- Cut long and creep up on it. You can always take another sixteenth off. Putting one back requires a new piece.
- Nail into framing. A finish nail into drywall alone holds nothing, and trim that pulls away in a year was nailed into paper.
- Test cuts go on scrap from the same run. Different bundles of the same profile can differ enough to matter at the joint.
- Coping is about the back-cut. Back-cut aggressively so only the front edge touches. A cope that bears on its full thickness will never close.