Learn · Carpentry
Cabinet Installation
Part of Carpenter, Frame to Finish · step 16 of 30 · next: Building Code Basics for Carpenters
In learning paths: Carpenter, Frame to Finish
Assumes you know: Trim and Casework
Cabinets go on level lines, and the level lines come off the high point of the floor. Every other approach (measuring up from the floor at each cabinet, or trusting the wall to be plumb) produces a run that steps, a countertop that will not sit flat, and doors that look wrong from across the room even when nobody can say why.
Why it matters on the job
A kitchen is the most looked-at carpentry in a house, and it gets installed against surfaces that are never true. Floors slope. Walls bow, lean, and meet at something other than 90 degrees. Your job is to build a level, square, flat assembly inside all of that, and the only way to do it is to establish your own reference and then scribe the difference away.
Find the high point first
Set a laser or a water level at a convenient height around the room and measure down to the floor at every cabinet position, plus both ends of every run. The smallest down-measurement is the high point of the floor. That is your datum, because a cabinet sitting anywhere else can be shimmed up to level, and a cabinet on the high point cannot be cut into the floor.
Worked example: a 12 foot run
Down-measurements taken from a level laser line, every 3 feet along a 12 foot wall.
- 0 ft: 47 3/4 in
- 3 ft: 47 5/8 in
- 6 ft: 47 7/8 in
- 9 ft: 48 in
- 12 ft: 48 1/8 in
The smallest reading is 47 5/8 in at the 3 ft mark, so that is the high point. The largest is 48 1/8 in at 12 ft. The floor falls 48 1/8 minus 47 5/8 = 1/2 in across the run, and all of it has to be shimmed out at the low end.
Say the specification is a 34 1/2 in base box under a 1 1/2 in countertop, with the wall cabinets 54 in above the finished floor. Work every line off the high point.
- Base line. 47 5/8 minus 34 1/2 = 13 1/8 in below the laser line. Strike that level around the run; it is the top of the base boxes.
- Shim at the low end. At the 12 ft mark the box now floats 1/2 in above the floor, so the toe kick needs 1/2 in of scribe or a filler strip there and nothing at the high point.
- Upper line. 54 minus 47 5/8 = 6 3/8 in above the laser line. Mark up from the line rather than down.
- Finished counter. 34 1/2 plus 1 1/2 = 36 in, which leaves 54 minus 36 = 18 in of backsplash between the top and the wall cabinets.
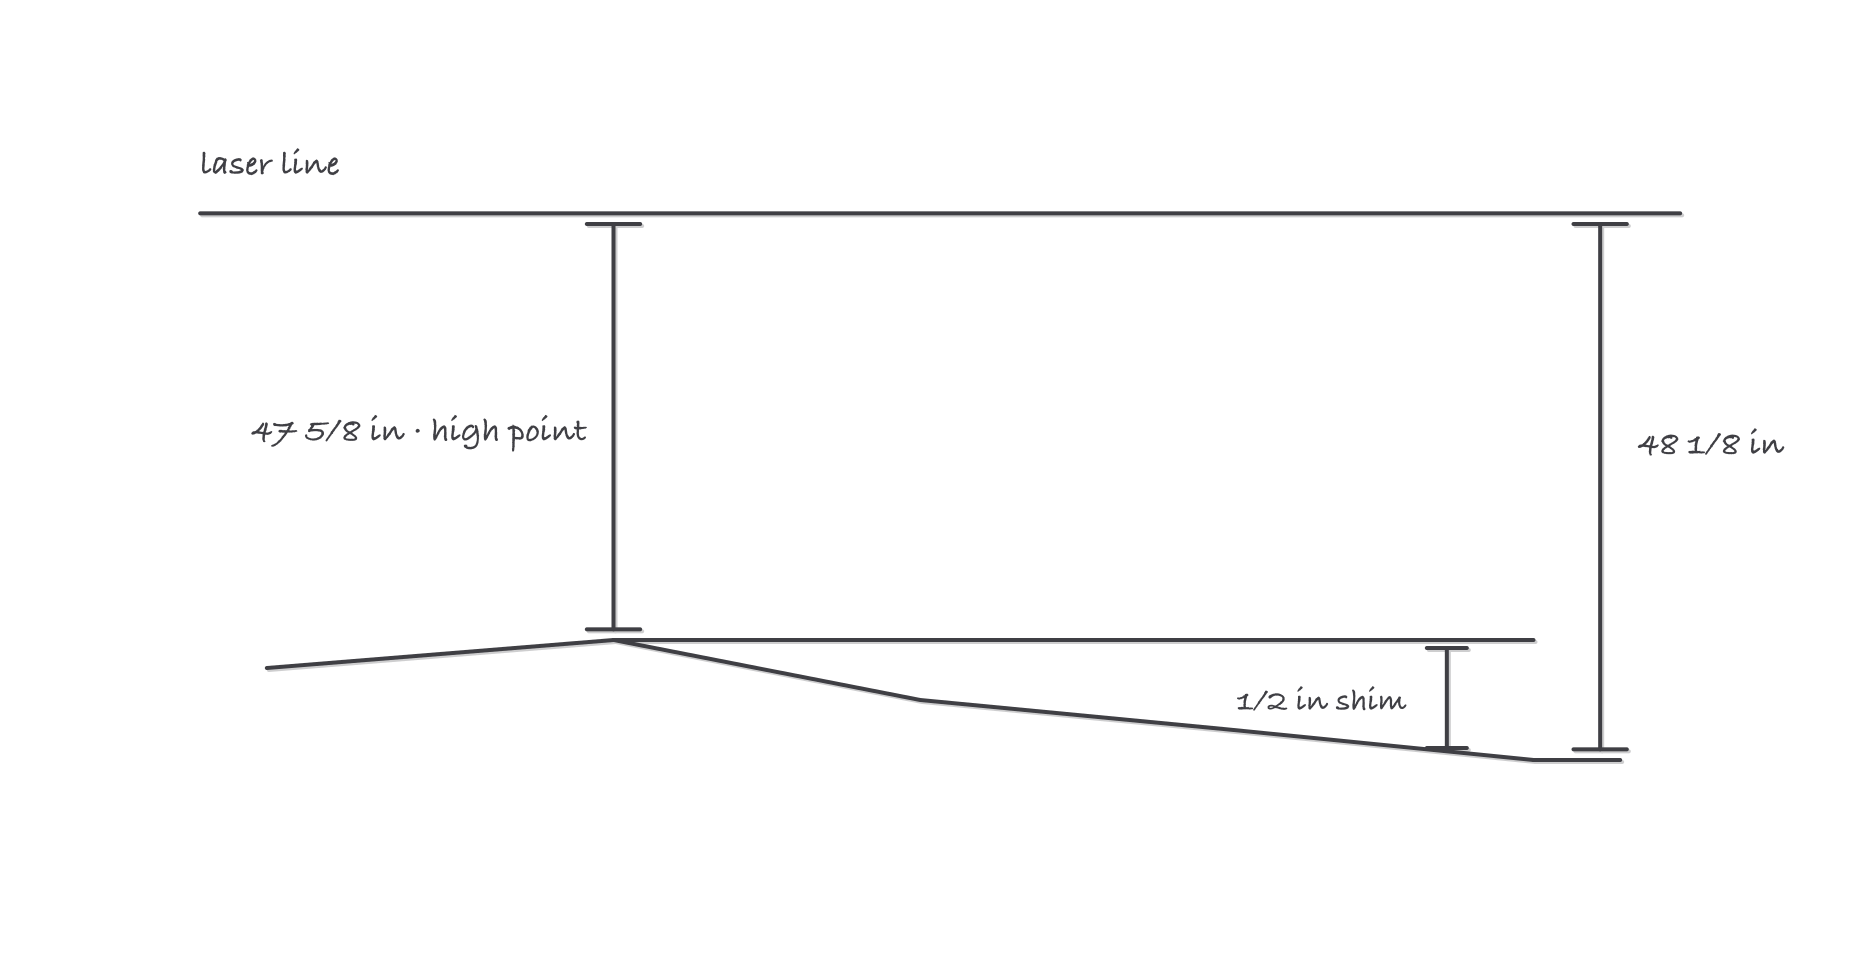
Every line comes off the high point, and the 1/2 in of fall becomes shim at the far end
Layout on the wall
Mark the studs across the whole run before a single cabinet goes up, and mark them above and below where the cabinet backs will land so the marks survive the install. Cabinet screws go through the hanging rail into framing. A wall cabinet loaded with dishes is a real load on a short lever arm, and drywall anchors are not an answer to it.
Transfer the cabinet layout from the plan onto the wall as well (stile lines, filler widths, appliance openings). A run that comes up 1/4 in short of the wall is a filler decision you make with a pencil, not one you discover with a screw gun in your hand.
Hang the uppers first
With the base cabinets still out of the room you can stand under the uppers, reach the back rail, and put a level on them without leaning across a box. Screw a temporary ledger to the wall on your upper line and rest each cabinet on it while you fasten.
Then set the bases to the base line, shim at every stud, and pull the run together at the stiles before you fasten anything to the wall.
Scribing
A scribe transfers the difference between your true plane and an untrue wall onto a cut. Set the cabinet plumb and level in its final position, run the compass along the wall with the point tracking the surface and the pencil marking the scribe stile, and cut to the line with a slight back bevel so the front edge closes tight.
Hold the compass at a constant attitude for the whole pass. Let it tilt and you have transferred a curve nobody asked for.
Where it bites
- The high point is a floor fact. Do not take your datum from a windowsill, an existing countertop, or the top of a baseboard already in the room.
- Level and plumb are not the same as flat. A run can be dead level and still out of plane if the wall bows and you pulled the boxes into it. Shim the back at the bows.
- Faces before walls. Clamp adjacent cabinets face to face and screw the stiles together before you drive the wall screws. Fixing a misaligned face afterward means backing out every screw you put in.
- The countertop is the audit. A 1/2 in fall you shimmed away vanishes under a solid top. A 1/2 in fall you followed shows up as a wedge of daylight at one end of a 12 foot slab, and the fabricator will not carry it for you.