Learn · Carpentry
Door and Window Installation
Part of Carpenter, Frame to Finish · step 14 of 30 · next: Trim and Casework
In learning paths: Carpenter, Frame to Finish
The unit that arrives on the truck is square. The opening in the wall is not. Installation is the craft of setting a square thing into a slightly wrong hole so that it operates correctly forever and sheds water while doing it.
Why it matters on the job
A door that binds and a window that leaks are both installation defects, and both get blamed on the product. Windows in particular are where framing, water management and finish carpentry meet, and a flashing sequence done backwards puts water inside a wall where nobody will see it for years.
Three sizes that are not the same
Unit size is the outside dimension of the door or window as manufactured.
Rough opening is the hole framed for it, deliberately larger so the unit can be shimmed plumb, level and square inside a wall that is none of those. The manufacturer’s instructions give the required rough opening, and it is the manufacturer’s number that governs.
Finished opening is what is left after the unit and its casing are in, and it is the number the flooring and trim work off.
Ordering to the wrong one of the three is a memorable and expensive lesson.
Check the opening before you open the box
Measure the opening width at the head, the middle and the sill. Measure the height at both jambs. Measure both diagonals. Check the sill for level and both jambs for plumb. Sight the opening for twist, because a wall can be plumb at each jamb and still not be in one plane.
Do this while it is still cheap to fix. A rough opening that is out of square can be adjusted with a sledge and a couple of nails before the unit is in; afterwards it cannot.
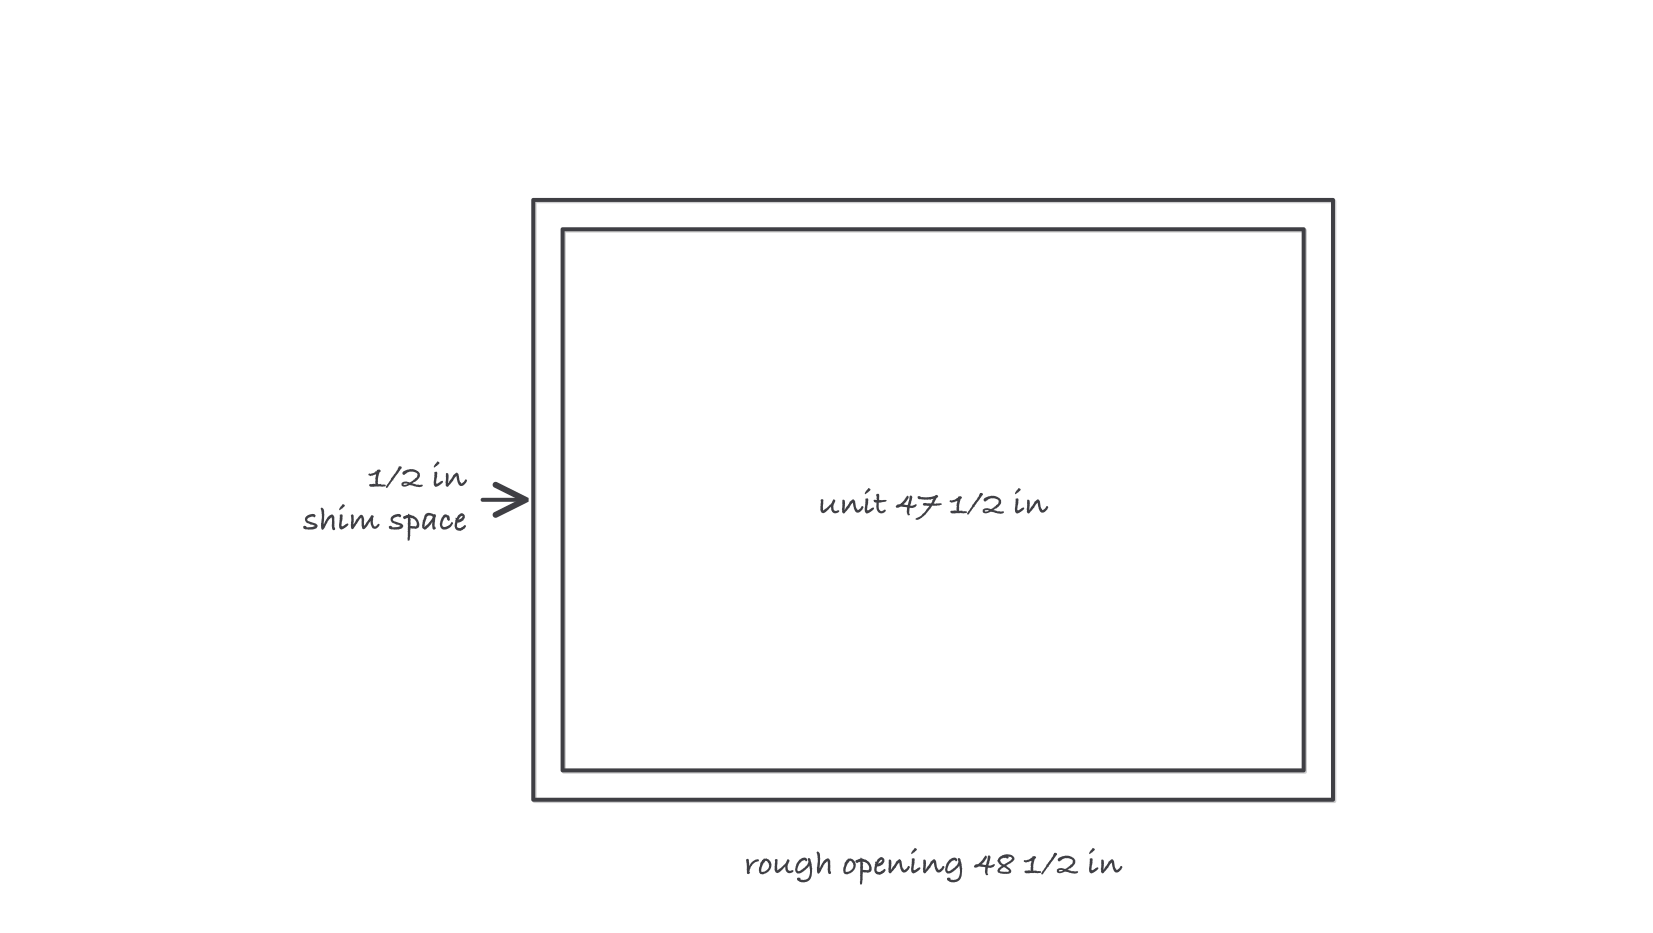
The rough opening is larger on purpose: that gap is where the unit gets made plumb and square
Worked example: checking a window opening
The unit is 47 1/2 in wide by 35 1/2 in tall. The instructions call for a rough opening 1 in larger in each direction, so 48 1/2 in by 36 1/2 in.
- Measured width at the sill: 48 1/2 in. Exactly the target.
- Measured width at the head: 48 5/8 in. The opening is 1/8 in wider at the top.
- Measured height at each jamb: 36 1/2 in. Correct.
- Measured diagonals: 60 3/4 in and 61 in. They differ by 1/4 in, so the opening is out of square.
Now the shim arithmetic. At the sill the total gap is 48.5 − 47.5 = 1.0 in, which centers as 1/2 in of shim space at each jamb. At the head the gap is 48.625 − 47.5 = 1.125 in, or 9/16 in each side if the unit is centered there.
That difference is the point. You do not center the unit in the opening; you set it plumb and level, and you let the shims absorb the fact that the two ends of the opening are different sizes. Shimming to a consistent gap would make the unit follow the wall’s error, and a window that follows an out-of-square opening does not seal.
The flashing sequence is a lapping problem
Water runs down. Every layer must lap over the layer below it, in this order for a typical flanged window:
- Sill pan first, formed or preformed, turned up at the ends and lapped out over the wall covering below.
- Set the unit into the pan and fasten it per the instructions.
- Jamb flashing next, lapping down over the sill pan.
- Head flashing last, lapping over the tops of the jamb flashings.
- Weather-resistant barrier integrated so that it laps over the head flashing and under the jamb and sill flashings.
Reverse any two of those and you have built a funnel that collects water and delivers it into the framing.
Doors: set the hinge jamb first
A door hangs off its hinge jamb, so that jamb gets plumbed first, in both directions, and fastened before anything else is touched. Everything after it is referenced to that one member.
With the hinge jamb set, hang the door and read the reveal: the gap should be consistent along the head and along the latch side. An uneven reveal is telling you the hinge jamb is out, not that the door is wrong. Fix it at the jamb. The strike plate goes in last, after the door swings true, because its position is determined by where the latch actually lands.
Where it bites
- Shim behind the fasteners, and only there. A shim in the middle of an unsupported jamb bows it, and a bowed jamb is a door that binds in one spot forever.
- Low-expansion foam, sparingly. Standard expanding foam generates enough force to bow a jamb inward. Use the product the manufacturer names, and never fill a cavity solid before checking the operation.
- A “level” sill is not always the requirement. Some manufacturers require a sill or sill pan sloped to drain outward, and their instructions override the instinct to make everything dead level.
- Fasten the way the instructions say. Nailing fin windows specify fastener type and spacing, and overdriving a fastener through the fin distorts the frame and voids the installation.
- Operate the unit before the fasteners are final. Open and close it, check the reveal, check that the sash or slab meets the weatherstrip evenly, and only then commit.