Learn · Roofing
Membrane Details and Terminations
Part of Roofer to Licensed Contractor · step 13 of 28 · next: Roof Drainage
In learning paths: Roofer to Licensed Contractor
Assumes you know: Low-Slope Systems: BUR, Mod-Bit, Single-Ply
A low-slope roof is a large area of membrane and a small number of details, and the membrane is not where it fails. It fails at the seams, at the terminations, and at everything that pokes through it. Those details are a small percentage of the material and most of the risk.
Why it matters on the job
The field of a membrane roof is production work: roll it out, fasten or adhere it, weld or tape the seams, move on. The details are slow, they are individually designed, and each one is a place where the continuous waterproof sheet has to stop or be interrupted and still work. A crew that is fast in the field and careless at the curbs has built a roof that leaks on schedule.
Seams
A seam joins two sheets into one sheet. How it is made is set by the membrane chemistry, not by preference: thermoplastics such as TPO and PVC are hot-air welded, and thermoset EPDM is joined with adhesive or seam tape.
What matters on the job is that a seam is verifiable. A completed weld can be probed along its edge, and the probe is part of the work rather than an inspection somebody else does later. The seam you did not check is the seam you will come back to.
Terminations
A termination is where the membrane stops: at a wall, at a parapet, at a curb, at an edge. Every termination has to do two things. It has to hold the membrane mechanically so wind cannot peel it, and it has to protect and shed water away from the cut top edge of the sheet.
That is what a termination bar is for, usually with a counterflashing or a metal edge above it, and usually with sealant at the top edge as a secondary measure rather than as the thing doing the work. A membrane that stops at a bead of sealant stops at a bead of sealant.
Height is the whole idea
On a low-slope roof, water stands, drifts and gets driven by wind. Every detail’s job is to get the membrane’s edge above the highest water this roof will ever hold, which is set by the drainage design and by the overflow, not by how much rain fell last year.
A termination above that level is safe indefinitely. A termination below it is a leak with a date on it.
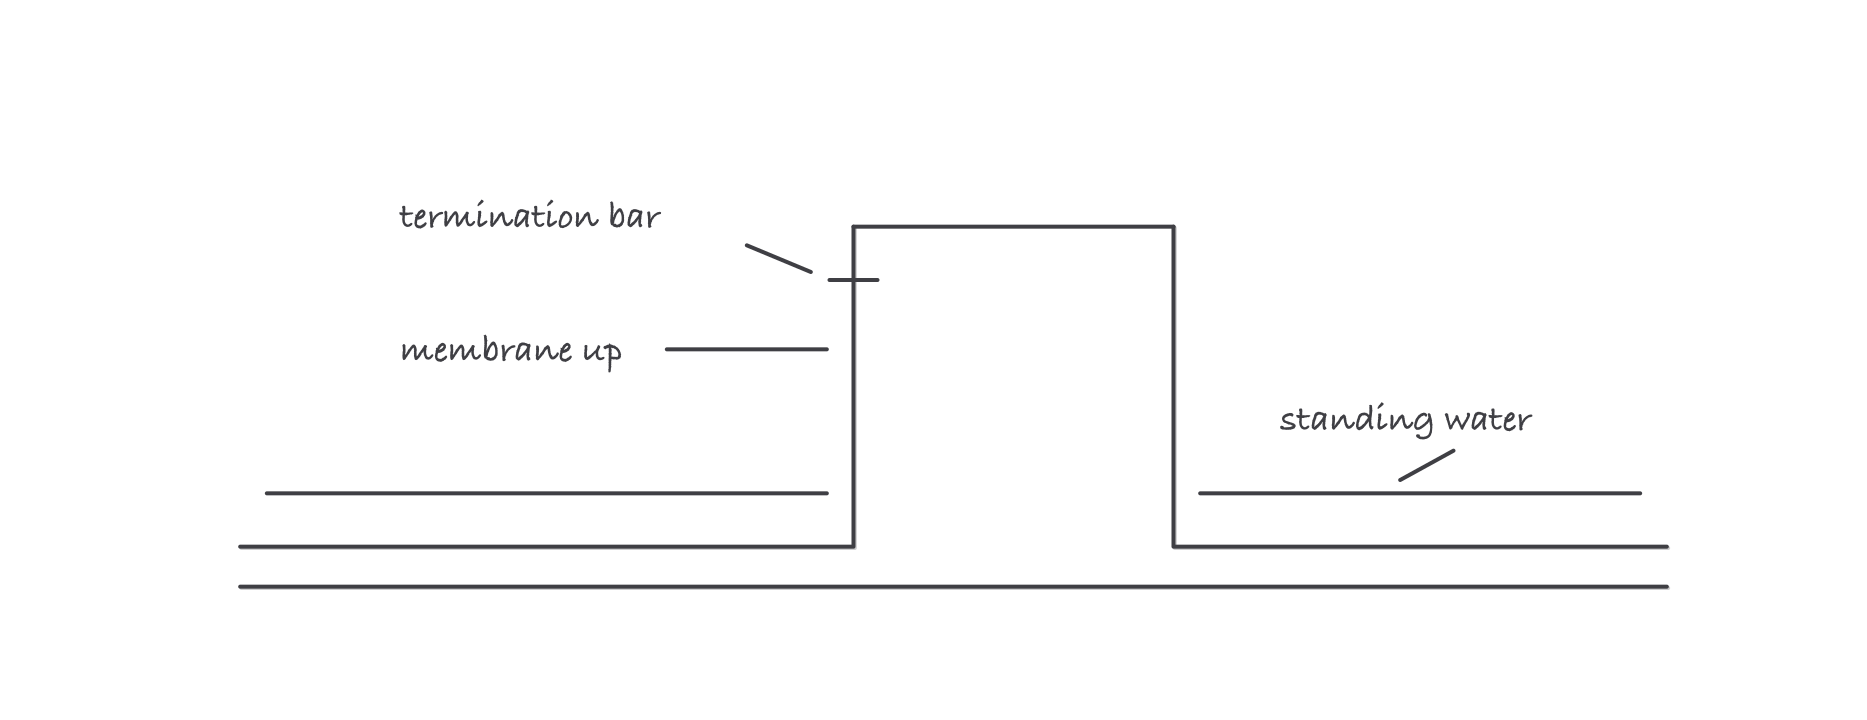
Every detail exists to get the membrane’s edge above the water the roof can hold
Penetrations and curbs
Penetrations are pipes, conduits, supports and anything else through the membrane. Each one gets a flashing that carries the membrane up the penetration, above the water, and clamps it there. A pipe boot sealed at the roof surface rather than clamped up the pipe is a detail that relies on the sealant again.
Curbs are the answer to the same problem for anything large: rooftop units, hatches, skylights, duct penetrations. The unit sits on a curb, the membrane runs up the curb face and terminates near the top, and the unit’s own flashing laps down over it. That lapping down over is the same principle as counterflashing on a steep roof: two pieces that overlap in the direction water travels, free to move independently, with no reliance on a sealed joint.
The failure mode is a rooftop unit set straight onto the membrane with no curb. There is then no height anywhere in the detail, and no amount of sealant supplies it.
Where it bites
- Details get designed on the roof. The field is drawn; the odd penetration in the corner often is not. That is exactly the one that leaks, and it is the one to slow down for.
- Sealant is a secondary measure. It belongs at the top edge of a termination bar, protecting a cut edge. It does not belong as the reason the detail works.
- Support feet and blocks wander. Anything set on the roof and not flashed, from conduit supports to duct blocks, moves under thermal cycling and abrades the membrane. Abrasion is a slow leak with no obvious entry point.
- Old repairs are details too. A patch over a bad detail inherits the bad detail. Take the patch off and look before you patch again.
Exam relevance
NRCA certifies Thermoplastic Systems Installer and EPDM Systems Installer separately, and both credentials belong to an individual worker. Each is earned through an online eligibility exam and a hands-on performance assessment carried out in front of an assessor.
Details are where a performance assessment earns its keep. Anyone can roll out a field sheet; an assessor is watching whether a termination is mechanically held, whether a penetration is carried up and clamped rather than sealed at the surface, and whether the candidate makes a seam that survives a probe. NRCA publishes 24 months of experience for the thermoplastic credential, and fees and renewal terms come from NRCA.
Verified requirements
| Where | Expires | Renewal | Continuing education |
|---|---|---|---|
| United States (federal) | Yes | 3 years | Training completed within the 3-year renewal cycle |
Information comes from issuing-authority sources. Confirm current rules, fees and eligibility with the authority before acting.