Learn · Solar
Roof Attachments and Waterproofing
Part of NABCEP PV Associate Prep · step 10 of 21 · next: PV Wiring and Rapid Shutdown
In learning paths: NABCEP PV Associate Prep
Assumes you know: Racking and Mounting
Every roof attachment is a hole in a system whose whole job is keeping water out. Flashing is how the roofing trade has always answered that: a layer that redirects water over the penetration so gravity carries it past, with sealant as backup rather than the plan. Get this right and the roof outlives the array. Get it wrong and the leak appears years later, under someone’s drywall, with your company’s name on the permit.
Why it matters on the job
Leaks are the number one liability in residential solar. Not electrical faults: water. A leak claim arrives long after the crew has moved on, costs far more than the attachment did, and is almost always traceable to a skipped flashing, a lag in sheathing, or a bead of sealant asked to do a flashing’s job. Waterproofing is also the workmanship an inspector and a roofer will judge you by.
How water actually moves
A shingle roof sheds water by lapping: every course overlaps the one below, so water always steps downhill over a joint, never into one. Flashing works by joining that system, not fighting it. A flashing plate slides under the shingle course above the penetration and lies over the course below. Water running down the roof crosses the flashing the same way it crosses any shingle: over the top, past the hole.
Sealant alone does not do this. Sealant is a maintenance item with a service life far shorter than the array’s. Any detail that relies on an exposed blob of caulk as the primary barrier is a future leak with a date to be determined.
Worked example: follow one lag through the roof
The sequence for a typical flashed attachment on composition shingles:
- Locate the rafter and mark the attachment point from the racking layout. Confirm structure, not sheathing.
- Drill a pilot hole into the center of the rafter. If the pilot misses or splits out, move; never widen a miss.
- Fill the pilot hole with roofing-grade sealant so the lag threads carry sealant into the hole.
- Lift the shingle course above and slide the flashing up under it, until its hole sits over the pilot.
- Drive the lag with its gasketed hardware through the flashing into the rafter, to the manufacturer’s torque. Snug compresses the gasket; crushing it destroys the seal.
- Confirm the lap: shingles above overlap the flashing top, the flashing bottom overlaps the shingles below.
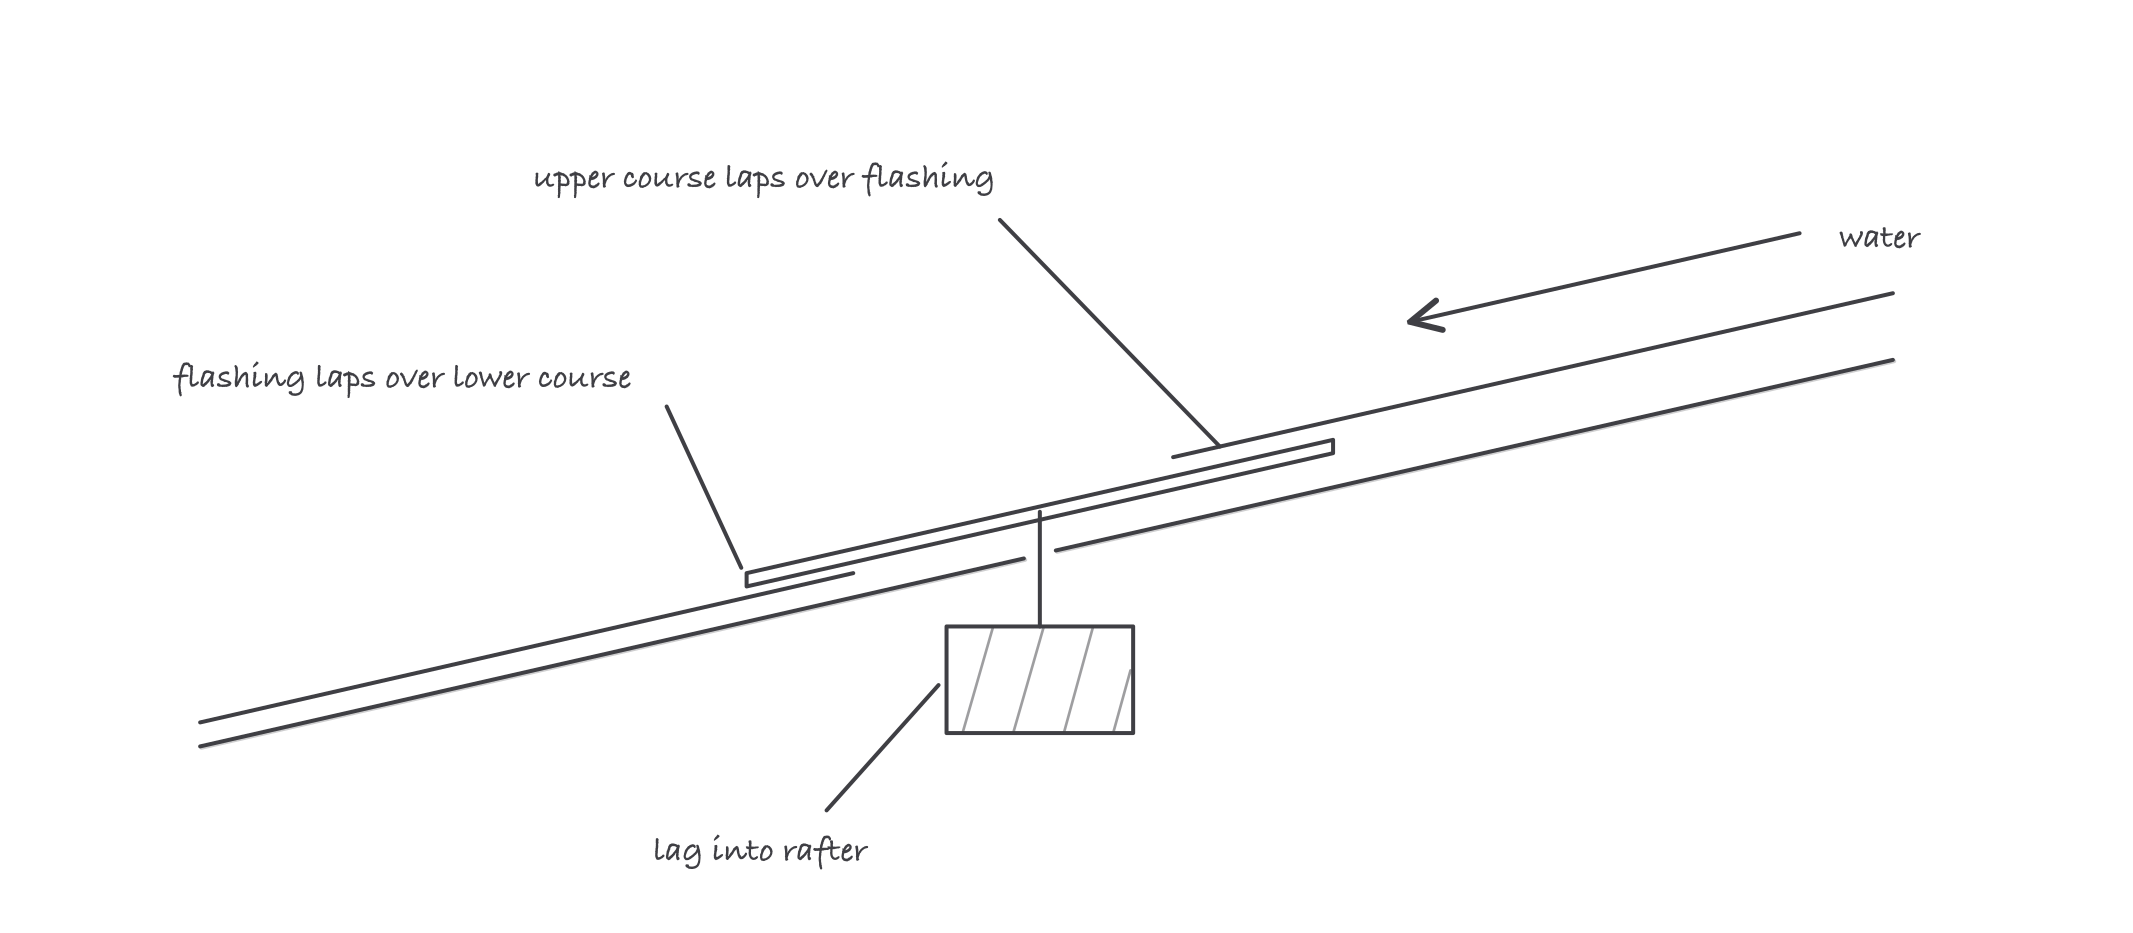
The lap does the waterproofing: water steps over the flashing exactly as it steps over any shingle course
A 16-attachment row from the racking lesson means running this sequence 16 times, and the roof is only as dry as the worst one.
Where it bites
- Sealant is backup, never the barrier. If removing the caulk would let water in, the detail is wrong. The lap does the work; sealant covers the fastener path.
- A missed rafter is two failures. The lag holds nothing structurally and it has punched a sealed hole in the wrong place. Mark misses, seal them properly, and relocate.
- Crushed gaskets leak. Overdriven lags dish the flashing and split the gasket. Torque to the spec, not to the impact driver’s opinion.
- Roof types change the detail, not the principle. Tile, metal, and flat membranes each have their own listed attachment and flashing systems. The constant: water must lap over the penetration. Match the attachment to the roof, per its manual.
- All of this happens at height. OSHA’s fall-protection trigger for construction work is 6 feet; flashing work lives past it. Protection comes before production.