Learn · Masonry and Concrete
Laying Brick to the Line
Part of Concrete Work to ACI Certification · step 9 of 22 · next: Block Walls and Reinforcement
In learning paths: Concrete Work to ACI Certification
Assumes you know: Mortar Types and Mixing
Laying brick to the line is the trade’s production method: build accurate corners first, stretch a tight mason’s line between them, and lay every brick in between to that line instead of leveling each one individually. The corners take the skill; the line delivers the speed.
Why it matters on the job
A journeyman bricklayer is paid for straight, plumb, evenly coursed wall built fast. Nobody achieves that one brick at a time with a level. The line turns a hundred individual alignment decisions per course into one: match the line. Learn the line discipline early and your wall speed multiplies without your quality dropping.
Build the leads
A lead is a stepped corner section, usually four to six courses high, built with the level: each course checked level along its length, plumb on both faces, and gauged for height. The leads carry all the accuracy in the wall. Rack each course back half a brick so the infill courses tooth in.
Height gauging is what keeps coursing even. Use a story pole or spacing rule marked with every course top, and hold each lead course to its mark by adjusting bed-joint thickness slightly, never by adjusting the brick.
Stretch the line
Hook line blocks (or pins) at the top of the current course on each lead and pull the line tight. The line marks the top front edge of the course. On long spans, a trig (a small clip and brick set mid-span) stops the line sagging.
Then lay to it: top edge of each brick level with the line, face of the brick about 1/16 in back from it. The brick never touches the line. A brick pushed against the line shoves it out of straight and every brick after it inherits the error, which is why “crowding the line” is the first habit a foreman corrects.
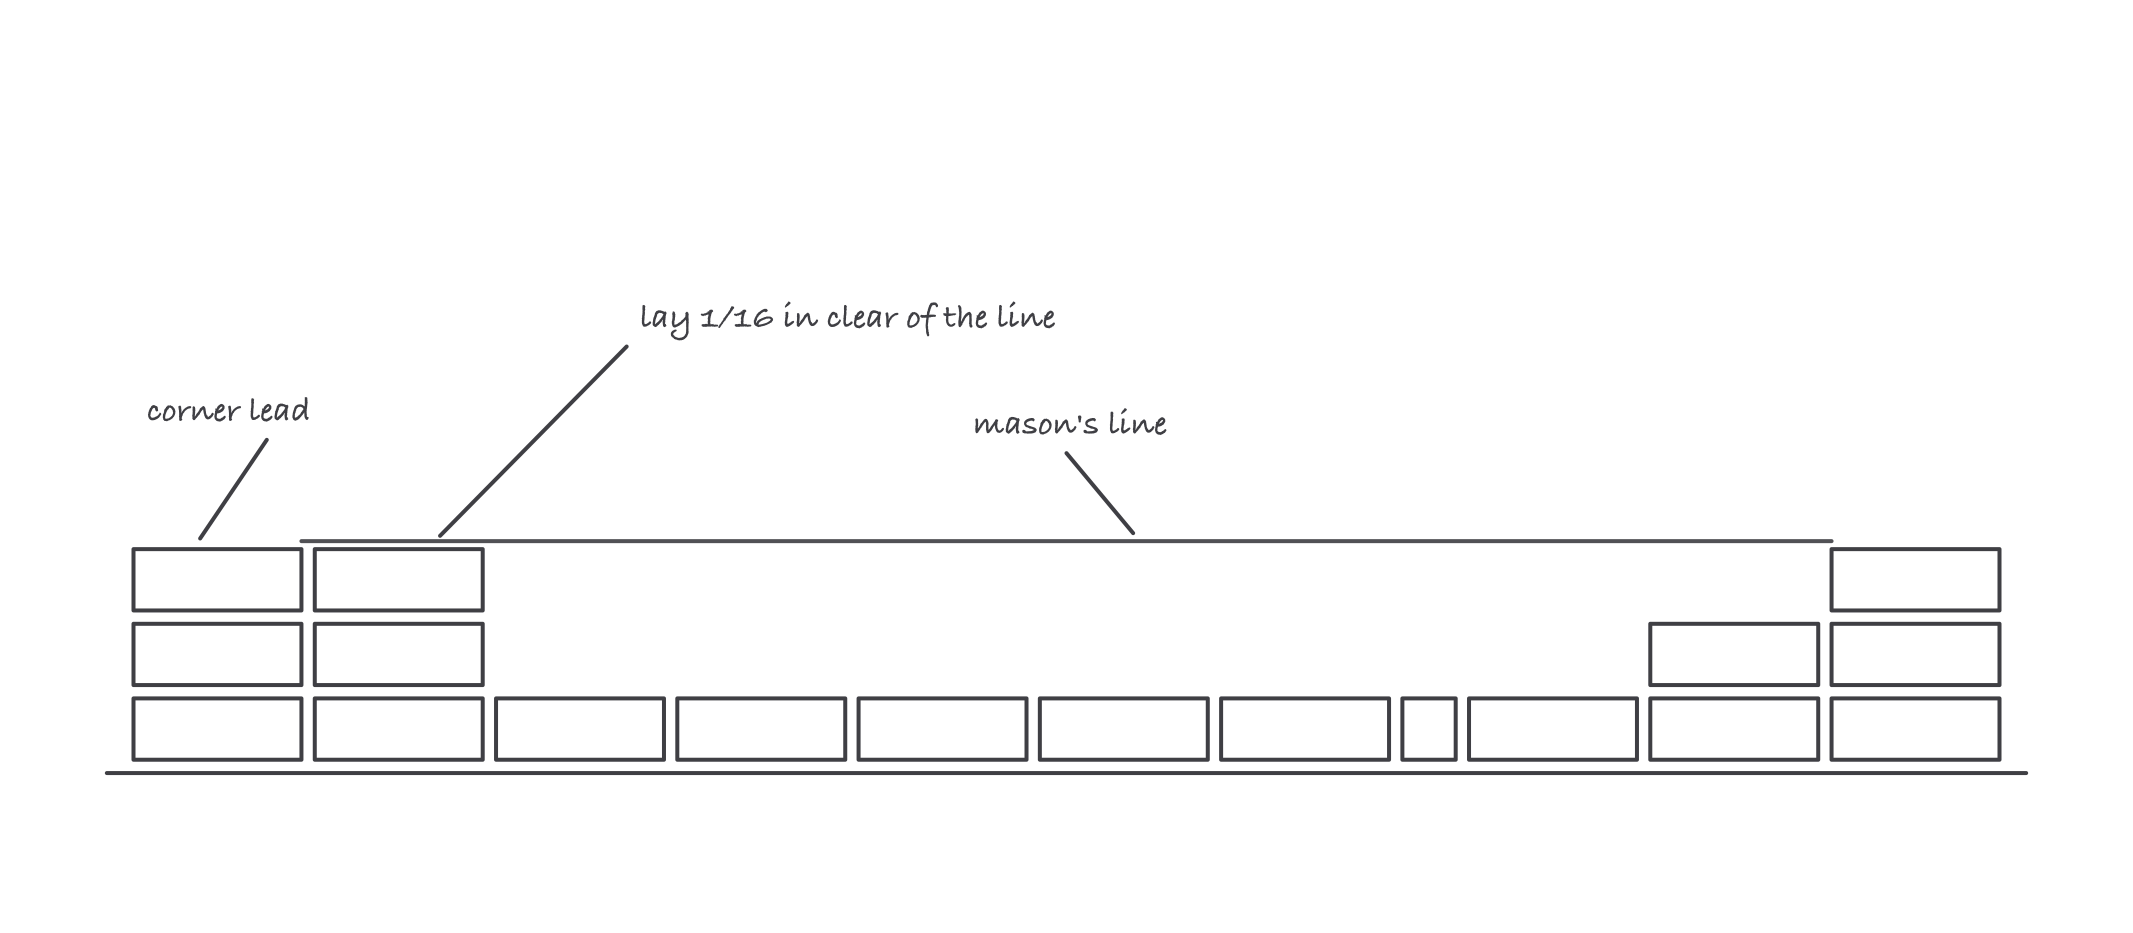
The leads hold the accuracy, the line transfers it: every infill brick lays to the line, one line-thickness clear
Spread, furrow, butter, press
Production rhythm for each brick:
- Spread a bed joint of mortar for several bricks at once and furrow it lightly with the trowel point so it beds evenly.
- Butter the head joint onto the end of the brick in your hand.
- Press the brick down and against its neighbor in one motion until it sits level with the line, 1/16 in clear. Joints finish at 3/8 in.
- Cut off the squeezed-out mortar with the trowel edge and return it to the board.
Set it right the first time. Tapping a brick after the mortar has stiffened breaks the bond between brick and mortar, and a broken bond is a future leak.
Worked example: courses to height
Standard modular brick courses at 2 1/4 in of brick plus a 3/8 in bed joint, and the modular system puts 3 courses in every 8 in of height.
- Wall height: 4 ft = 48 in.
- Courses per inch: 3 courses / 8 in, so 48 × 3 / 8 = 18 courses.
- Check with the story pole: course 18 should land exactly on the 48 in mark. If your leads gauge to the pole, the line does the rest of the wall.
Where it bites
- Crowding the line. One brick touching the line bends it, and the error propagates down the course. 1/16 in clear, every brick.
- Chasing height with the brick instead of the joint. Coursing is corrected in bed-joint thickness within tolerance; forcing thick and thin bricks to marks makes wavy beds.
- Tooling too early or too late. Strike joints at thumbprint hardness: mortar takes a clean concave profile when a thumb pressed into it leaves a print without wet mortar lifting. Too wet smears; too dry burns and leaves black marks.