Learn · Masonry and Concrete
Joints and Crack Control
Part of Concrete Work to ACI Certification · step 4 of 22 · next: Curing
In learning paths: Concrete Work to ACI Certification
Assumes you know: Finishing Flatwork
Concrete shrinks as it dries, and restrained shrinkage means cracks: not a risk, a certainty. Jointing is how you negotiate with that certainty. A control joint does not prevent the crack; it invites it to happen along a straight, clean line you chose, instead of wandering across the middle of the slab.
Why it matters on the job
A random crack and a controlled crack are the same physics with opposite outcomes: one is a defect the owner photographs, the other is a joint nobody notices. Joint layout, depth and timing are cheap decisions made once; random cracking is permanent. Foremen and finishers own these decisions on most flatwork.
The joint taxonomy
Four names, four different things, and mixing them up causes real detailing errors:
- Control (contraction) joint: a deliberately weakened plane, sawcut or tooled into the slab, that tells the shrinkage crack where to run. The crack forms below the cut, hidden and straight.
- Construction joint: where a pour stopped and a later pour continued. Planned, formed, often keyed or doweled to transfer load. A good construction joint is placed where a control joint was wanted anyway.
- Isolation (expansion) joint: a full-depth, full-width separation (compressible filler) between the slab and anything fixed: columns, walls, footings, drains. It lets the slab move without pushing against the structure. Nothing crosses it, including reinforcement.
- Cold joint: the accident. Fresh concrete placed against concrete that already stiffened, with no plan and no preparation. It is a defect to prevent, not a joint type to specify.
The two numbers that control cracking
Depth: one quarter of the thickness. A sawcut or tooled groove must reach D/4 to reliably weaken the plane; shallower cuts get ignored by the crack.
Spacing: 2 to 3 times the thickness, read in feet. Take the slab thickness in inches, multiply by 2 to 3, and treat the result as feet (a 4 in slab wants joints every 8 to 12 ft). Keep panels close to square, and never let a panel’s long side run past about 1.5 times its short side. Cut extra joints at re-entrant corners (inside corners at boxouts and openings), because cracks launch from them.
Timing: as soon as the saw will not ravel the cut. Shrinkage stress builds from the first hours; a cut made the next morning often finds the crack already there. Conventional saws enter within roughly 4 to 12 hours of finishing (sooner in hot weather); early-entry saws cut within the first few hours. Cutting concrete is also a silica task: wet-cut or use a shrouded saw with dust collection per Table 1, never a dry blade in open air.
Worked example: jointing the patio slab
The same 30 ft by 20 ft, 4 in slab from the placing lesson:
- Spacing: 4 in × 2.5 = 10, so joints every 10 ft.
- Layout: 30 / 10 = 3 panels one way, 20 / 10 = 2 panels the other: six 10 ft by 10 ft squares, cut at two lines across the length and one across the width.
- Depth: 4 / 4 = 1 in cuts.
- Aspect check: 10 / 10 = 1.0, comfortably under 1.5.
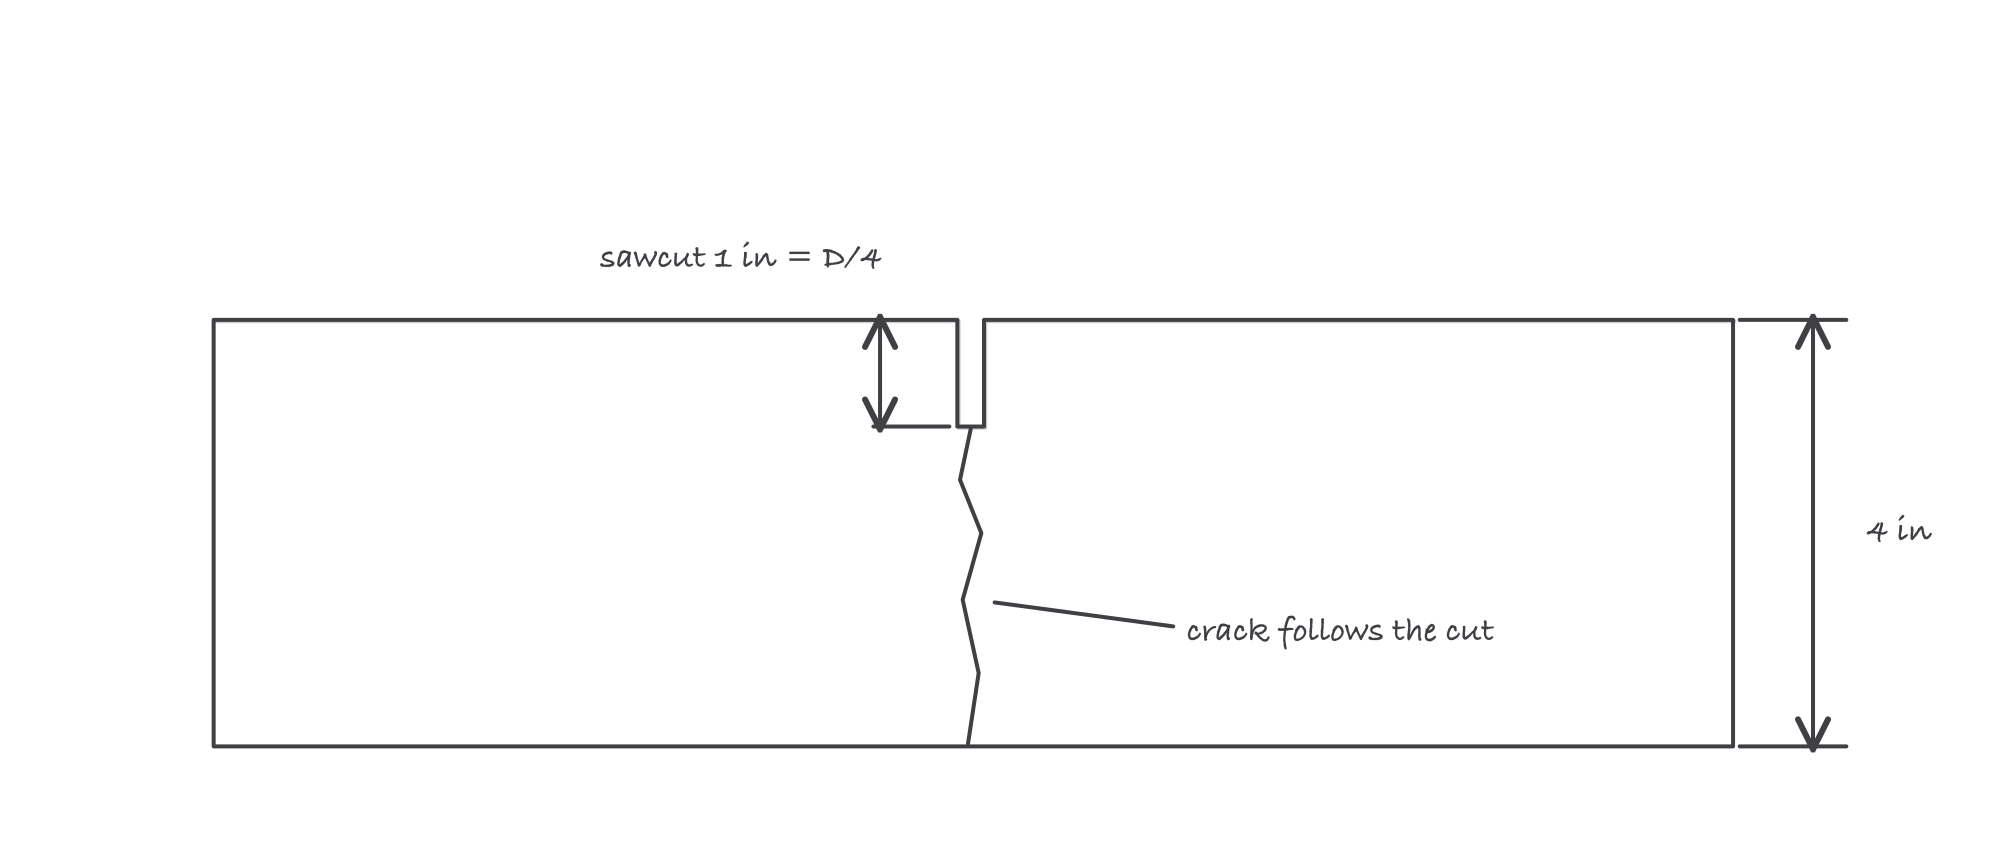
The cut is the invitation: a D/4 groove weakens the plane and the shrinkage crack accepts, straight down and out of sight
Where it bites
- Shallow cuts. A 1/2 in scratch in a 5 in slab controls nothing; the crack goes where it pleases. D/4, measured, every joint.
- Cutting on tomorrow’s schedule. Joint timing belongs to the concrete and the weather. If the crew leaves before cutting, the crack often beats the saw to it.
- Re-entrant corners without relief. Every inside corner is a crack starter; give each one a joint or diagonal reinforcement.
- Isolation joints doing control duty (or the reverse). A control joint is a weakened plane in continuous concrete; an isolation joint is a full separation. Swap them and you either crack at the column or lose load transfer where you needed it.